Description
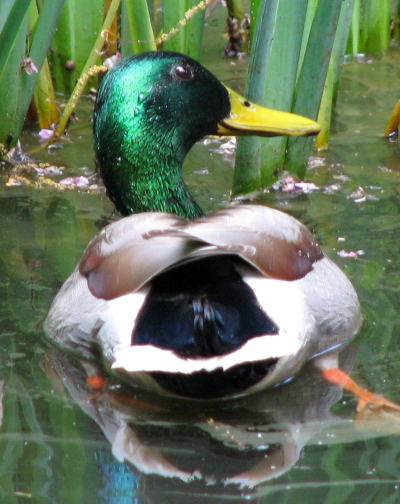
The purpose of this script is to minimize the purple fringe that shows up in high contrast areas of photographs where chromatic aberration has occurred. For more information, see this entry about
Purple Fringing on Wikipedia. This script will not be the answer to every purple fringe situation, but it can provide a quick fix in many cases
and save an otherwise beautiful photograph. Because this script works by desaturating only the high contrast edges of your photograph, it can be used to minimize other types of chromatic aberration as well, as you also desaturate levels of magenta, blue, red and cyan in the high-contrast edges of your photo.
You can find the script at the GIMP Plug-In Registry. After you install the script (download and place in
your script folder), refresh your scripts ([Menu] –> ).
You will find this script under
[Menu] –> .
(If you have trouble, revisit the main GIMP Corner page for more information about the GIMP and using plug-ins).
Using the Script
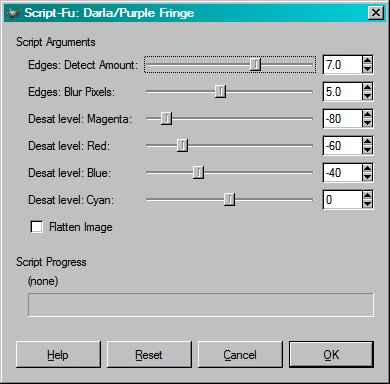
Run the Script
The default values should work for most photos.
Fine tuning of the first two edge numbers may be required in some cases.
The "Desat levels" for each colour are the amount of desaturation to apply. In the case of larger photographs, you may need to be more aggressive and use larger (negative) numbers, as well as also applying a desaturation to the cyan edges.
After Running the Script - Fine Tuning
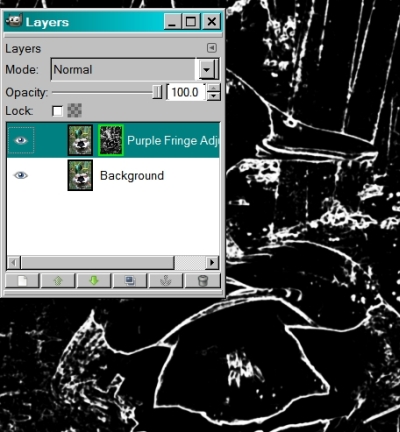
Do not flatten the image, if adjustments may be desired.
The layer mask can be adjusted using colour curves.
For example, if too much of the photograph has being desaturated, show the layer mask (right-click on layer, choose "Show Layer Mask"), and then choose
[Image] –> .
Usually, it is desirable to add two points to the curve, one to lower the left hand side and minimize the amount of gray areas, and another on the top right, to push up this side and increase the brightness of the white areas
(commonly referred to as an "S-Curve").
Also, if there are any areas of the photo that shouldn't be affected by the script, you can simply black them out of the mask, using an appropriate brush or selection tool.