Description
Contrast masking is a very common way to fix photos. This script can help you with photos that are too bright ("burned out") or are too dark in areas.
How you use this script will vary by the quality of the original photograph.
It script will create an adjustment layer that you can alter the mode and opacity of, or you can edit the resulting layer/mask if you only want to work
with one region of your photo. The script can also be run more than once (make sure you select the image as the active layer first), to adjust both the dark and bright areas of a high contrast photograph.
The three ways of running this script are explained here:
You can find the script at the GIMP Plug-In Registry. After you install the script (download and place in
your script folder), refresh your scripts ([Menu] –> ).
You will find this script under
[Menu] –> .
(If you have trouble, revisit the main GIMP Corner page for more information about the GIMP and using plug-ins).
Using the Script
Contrast Mask (affecting whole image)
By default, the script will run the standard contrast mask method, as described
here and here
on the Luminous Landscape website, a great photography resource.
Once the script runs, the effect can be adjusted by changing the layer mode and opacity of the resulting "Contrast Adjustment" layer. You can also make additional adjustments to the layer, such as adjusting the colour curve.
(See S-Curve.)
The effect of the script can also be altered by choosing different numbers for the amount of blur that is added to the contrast mask.
Really dark photographs may benefit from having the script run more than once, using a different blur number each time (make sure the original image is the active layer before you re-run the script).
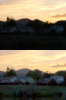
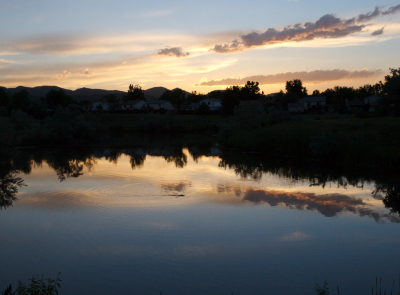
Example
Contrast Mask for Dark Areas Only
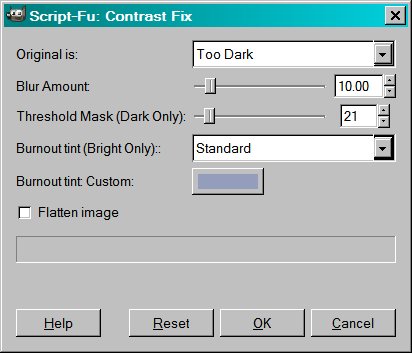
If you want to use the contrast mask for adjusting only the dark areas of a photograph, you can do that using these settings.
Just specify a threshold number.
To find the threshold number, choose (<Tool> Colour Tools –> Threshold) from the GIMP menus, then move the slider until you find the most accurate division between the dark and light areas photograph.
Don't worry if it isn't perfect -- You can always edit the mask later. Choose Cancel after you discover what this number is.
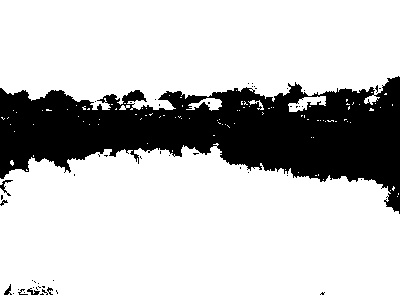
In our example, we found the best value for our threshold number was 21. See the illustration to the right:
Example - threshold value of 21
Notice how specifying a threshold number tells the script to only affect the dark areas of the photo, the other areas remain unaffected.
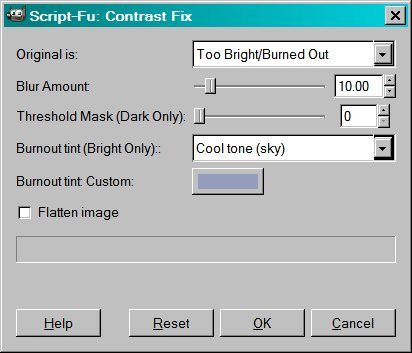
Contrast Quick Fix for "Burned Out" photos
This script will help as a quick fix for some photos that are too bright or burned out. When you choose the "Too Bright/Burned Out" option, you
may also specify a colour for tinting that will be applied to the white areas of the photos. Several colours options are provided: Standard, Cool tone (sky), Warm Tone (skintone), as well as the
option of providing your own Custom colour choice.
Usually you will want to adjust the opacity of the resulting new layer, so it is advised that you do not choose the "Flatten Image" option.
If you have a wide expanse of sky you want to work with, or if a threshold mask would be more appropriate than a contrast mask, consider using the
Blue Sky Gradient instead.
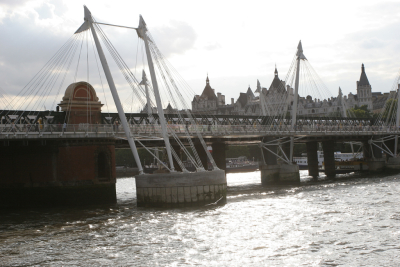
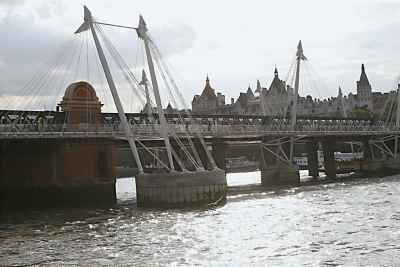
Example
Note that this image had the contrast fix applied for dark and light, plus a sharpening layer.