Description
Add a blue sky gradient to your skies (for "burnt-out" / burned-out white skies).
Note: This script is for adding colour to the sky area of your photo, and by default will simply darken any existing cloud texture that exists in the image.
If you want to generate clouds, then you may want to try the Blue Sky & Clouds script.
You can find the script at the GIMP Plug-In Registry. After you install the script (download and place in
your script folder), refresh your scripts ([Menu] –> ).
You will find this script under
[Menu] –> .
(If you have trouble, revisit the main GIMP Corner page for more information about the GIMP and using plug-ins).
Using the Script
Find a Threshold Number
The trick to running this script successfully is to choose the best threshold number. You can test this out beforehand by selecting Threshold from the GIMP menus
([Image] –> ),
then move the slider until you find the most accurate division between the sky and the rest of the photograph.
Don't worry if it isn't perfect -- You can always edit the mask later. Choose Cancel after you discover what this number is.
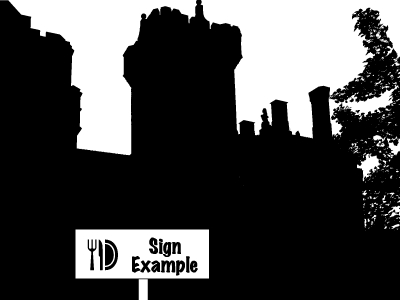
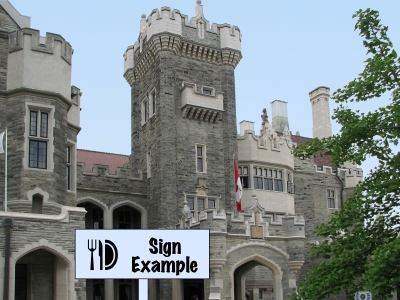
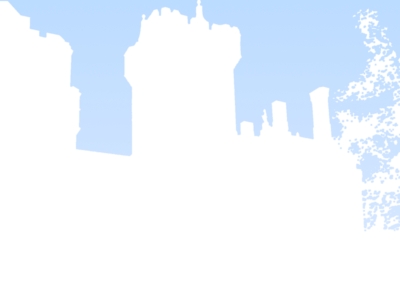
In our example, we found the best value for our threshold number was 234. See the illustration to the right:
Run the Script
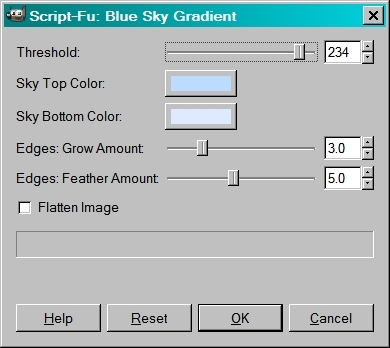
Next, run the script ([Menu] –> ). The input for our example photo is pictured at right:
Notice that we enter the threshold number, 234, that we found in our earlier step. For this example, we are accepting the default colours, but both of these can be changed.
If you don't want a gradient effect, then choose the same colour for the top and bottom.
Keep in mind that the script assumes the horizon in the photograph will be level, and that the gradient is calculated from the top to the bottom of the photo, regardless of where the actual horizon line is. Therefore, you will usually want to enter a slightly lighter colour for the bottom sky colour than what you're hoping for at the horizon.
The next two numbers are for fine-tuning how the edges are handled. These are applied to the threshold masking in order to make the transition between the sky and your other photo elements as smooth as possible.
Usually the default values should suffice, but you may need to adjust these numbers for very large photographs.
Unless you are certain you won't need to do any additional adjustments, leave the "Flatten Image" option unchecked.
After Running the Script - Fine Tuning
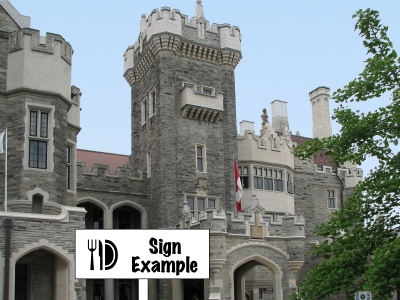
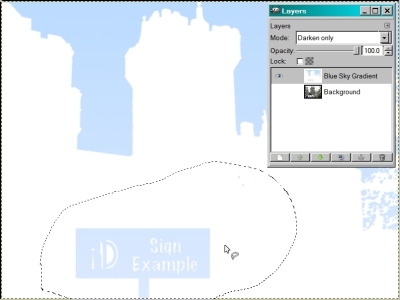
After running the script, we see that a new layer called "Blue Sky Gradient" has been created. Sometimes this layer will need to be edited.
In our example, the white sign in the foreground needs to be masked out, so that it retains its original white colour.
You can use something like the lasso tool  to select the area, then Fill with White ([Image] ).
To work with smaller areas, use one of the brush tools.
to select the area, then Fill with White ([Image] ).
To work with smaller areas, use one of the brush tools.
The edited new layer is show at right:
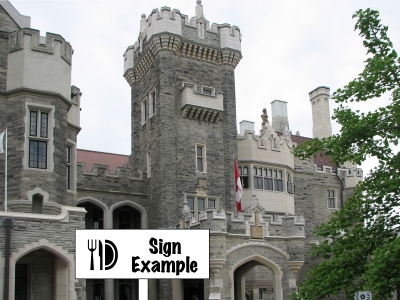
You can also adjust the mode and opacity of the "Blue Sky Gradient" layer to increase or decrease the effect of the new layer. In the example at right,
the opacity has been changed to 50%, so that the effect of the blue sky isn't as dramatic as it was at 100%.
The default mode for the "Blue Sky Gradient" layer is "Darken only" so that detail in the sky area of the photo will not be lost.
If there is insufficient detail in your photo or you want to add generated clouds, see the Blue Sky & Clouds script.